


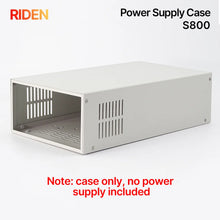
RIDEN S800 Power Supply Case for RD Power Supplies for RD6012/RD6018/RD6012P/RD6024
Note
- Only Case
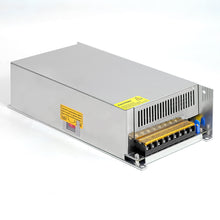
- For S800 case, it is just case, not containing any power supply, it contains the internal cables and screws, it is suitable for RD6012/RD6018/RD6024 and AC-DC 800W/1000W/1200W/1500W switching power supply, you can buy them separately to assemble then together.
Notice:
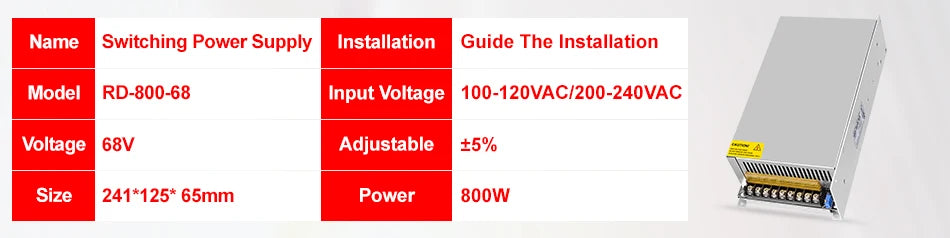
1. S800 case is only case, not containing any power supply. It is suitable for RD6012/RD6018/RD6024 and AC-DC 800W/1000W/1200W/1500W switch power supply, you can buy them separately to assemble.
RD6012/RD6018/RD6012P/RD6024 and S800 case assemble instruction
Installation video
There may be scratches on the surface but it doesn't affect the product performance, please do not be over picky, and if you do mind this, please do not buy this product. During the shipping, maybe the case side will be a little deformation (just like picture ), you can use your hand to adjust, that's OK, if you do mind this, please stop buying.
2. You can only connect the cables with a foundation in electronic and electrical engineering and it must be reliably grounded! Since the assembly process involves voltage that exceeds the human body's safety, non-professionals should not operate, you must do insulation and protective measures during the assembly process, and check the wiring several times for safety, please place the product at a place that children and old people cannot get.
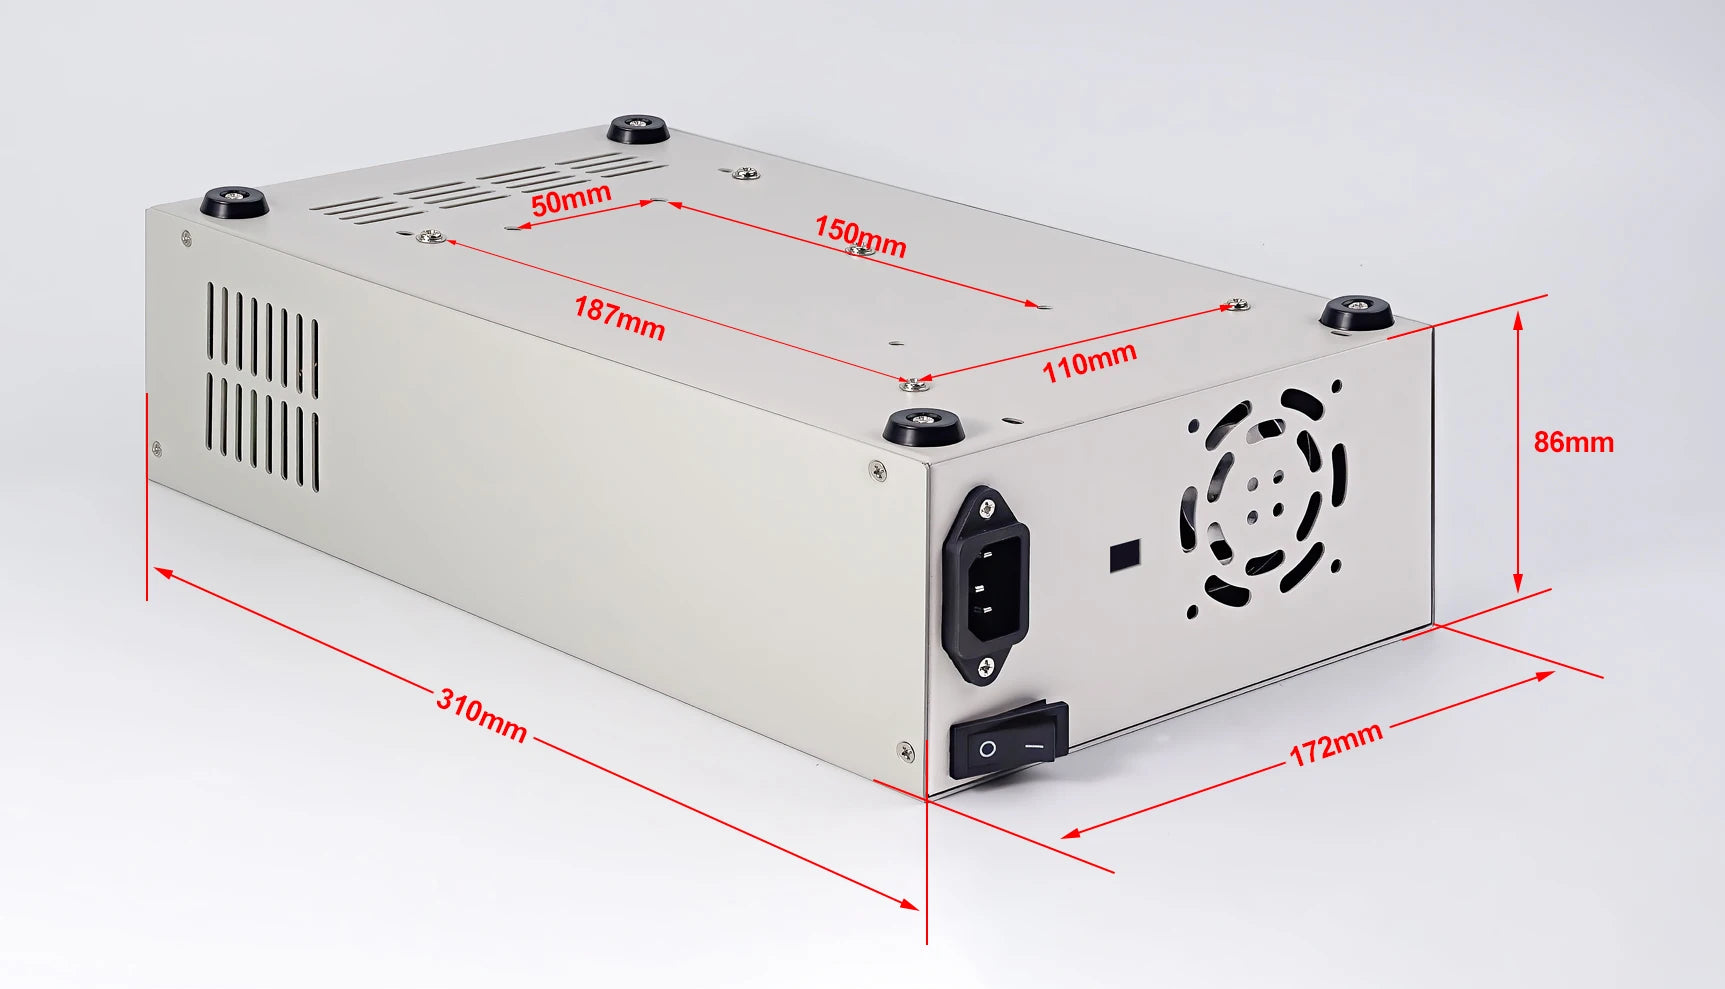
Please use the switch power supply we recommend, and if you use other power source, check if the positions of fixing holes are suitable or not.
3. Due to express delivery, some power supply warranty labels may be damaged, which does not affect product warranty!
4. Due to the different power supply production batches, the internal material details may be different.
5. When install our 800W PSU into our case, please follow our instruction to assemble, do not remove the shell of the PSU to use. After the shell of the switching power supply is removed, the structural change of the heat dissipation system will lead to insufficient heat dissipation, and some components will be overheated and damaged, in this case we don't offer after-sale service.
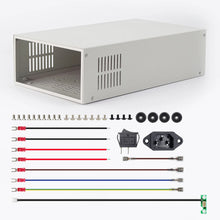
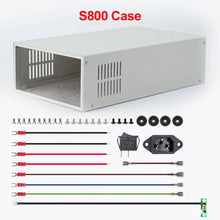
Accessory List of S800 Case:
A: Lower Board
B: Upper Board
C: Screws for fixing mats, extension board and switch power supply
D: Screws for fixing case and AC power socket
E: Screws for fixing mats
F: Non-slip mats
G: Rocker switch
H: AC power socket
I: Connection Cables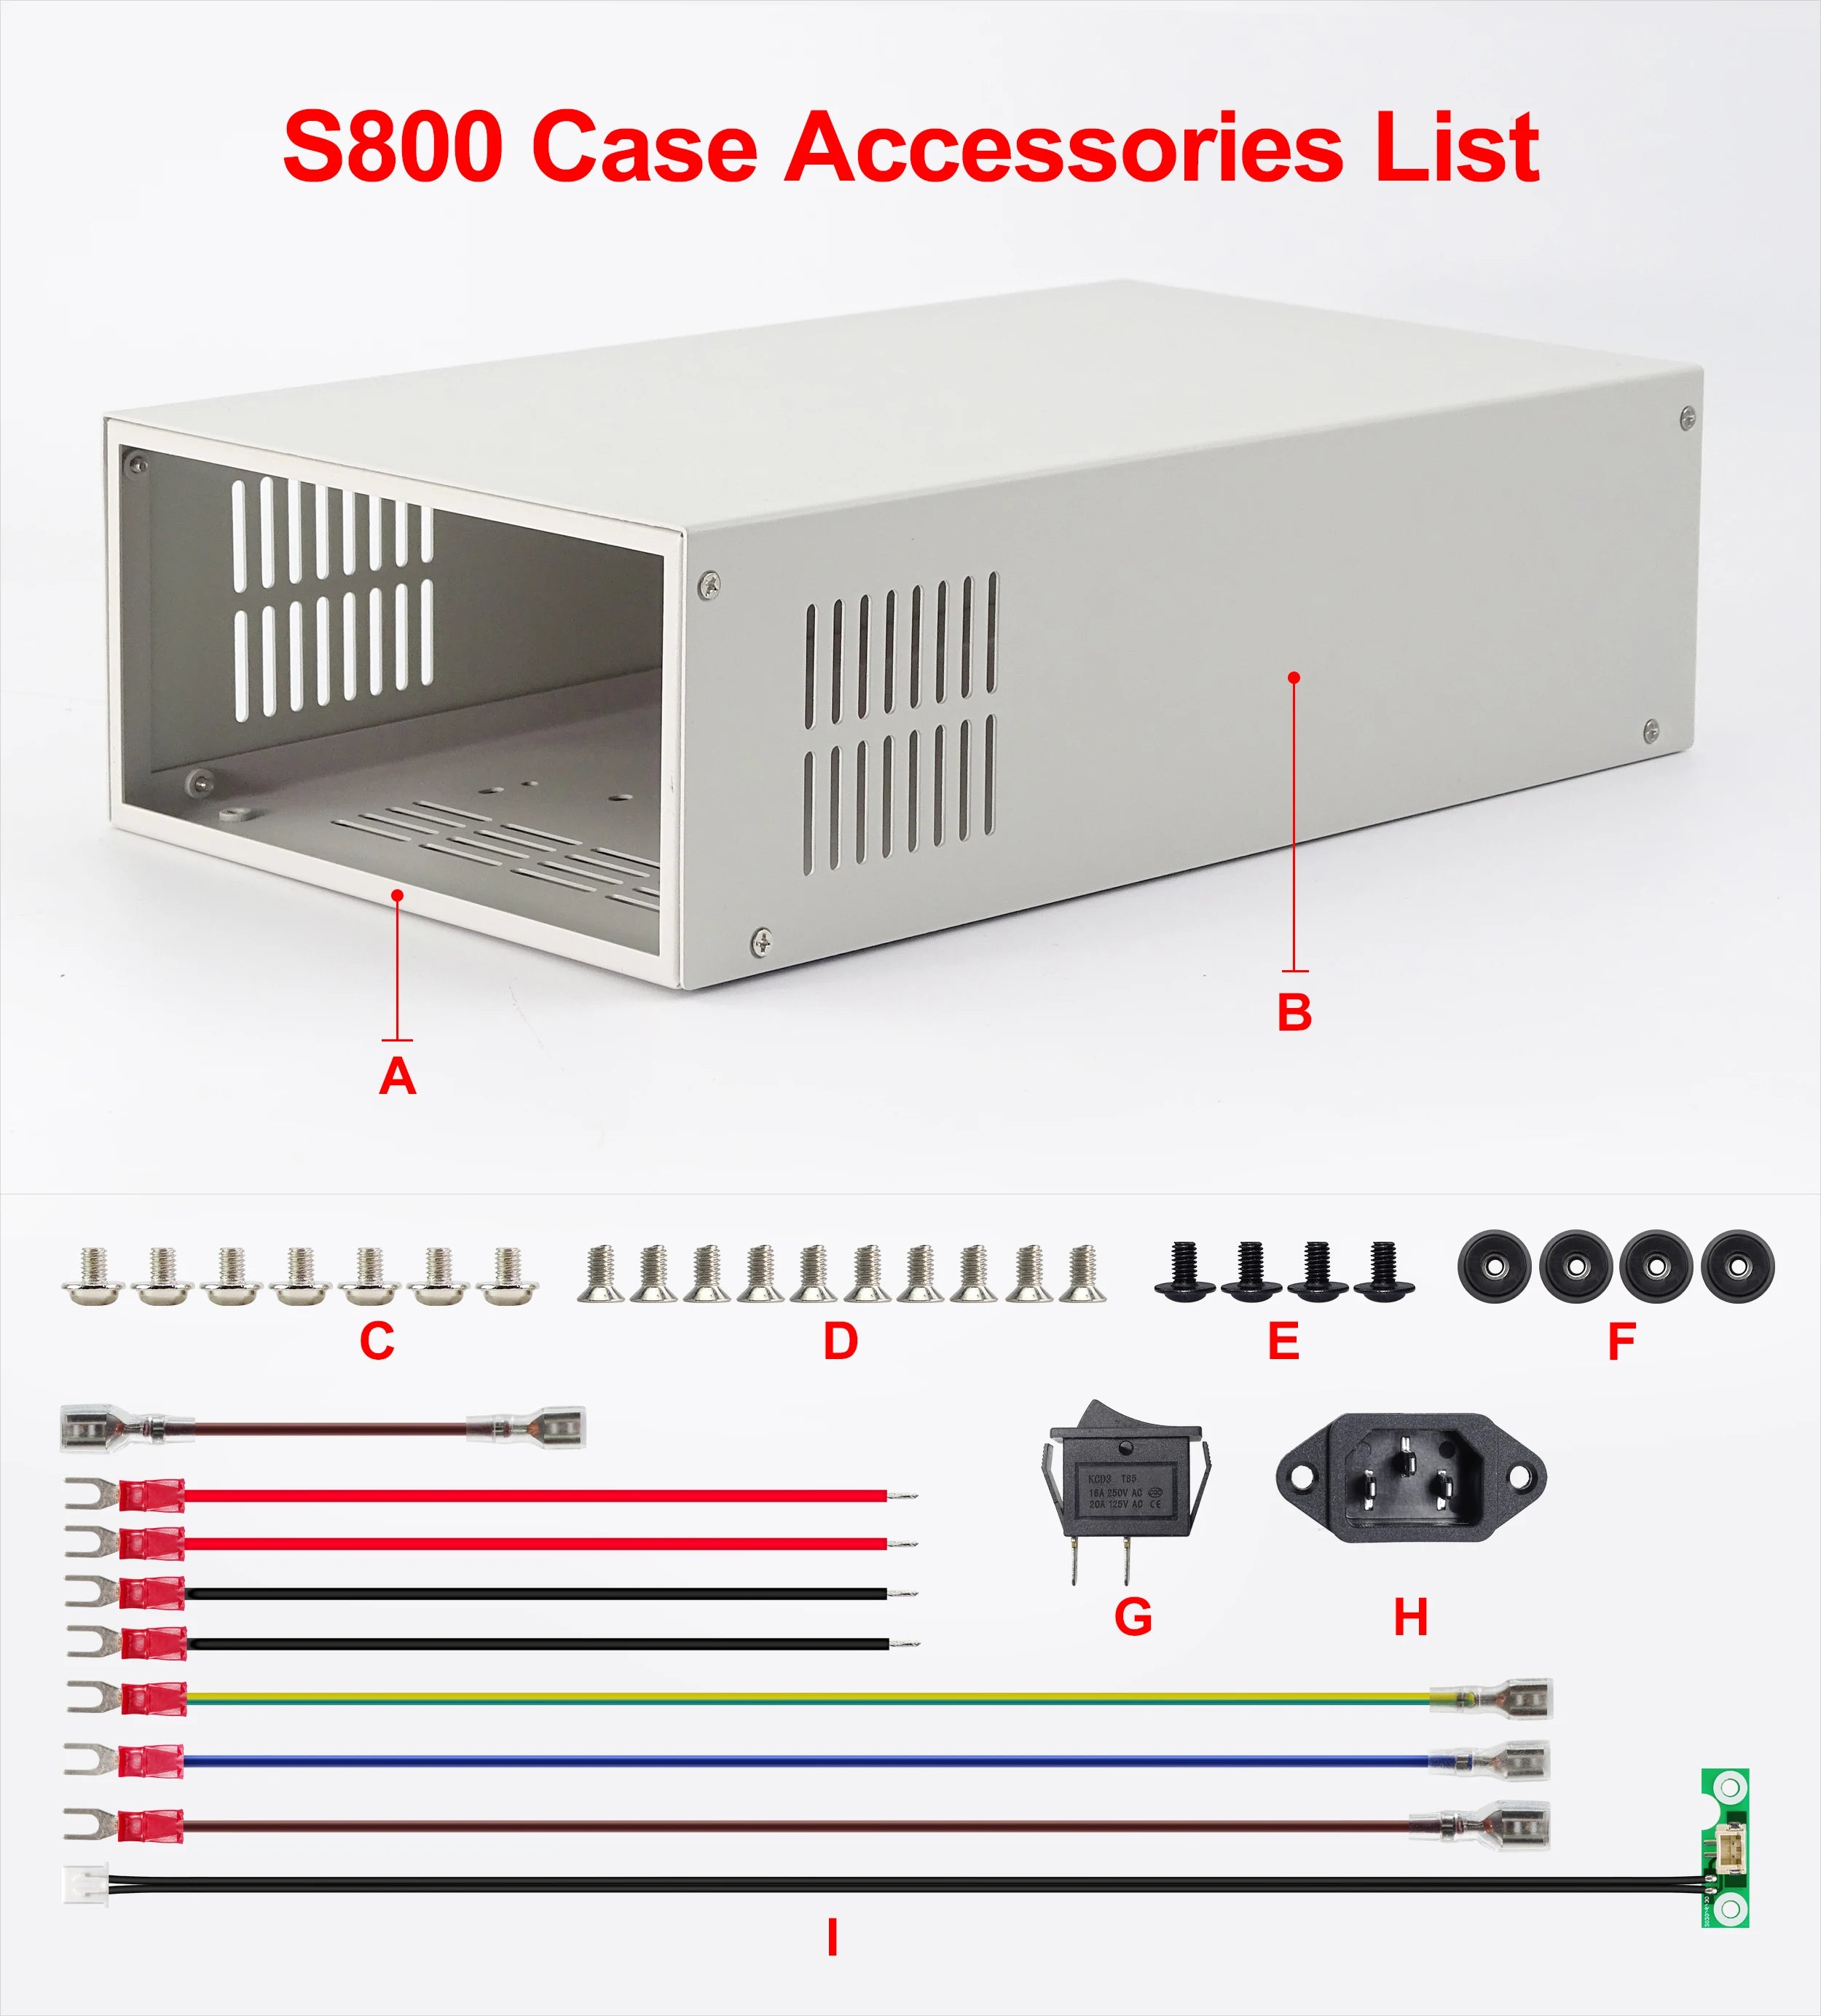
Assembly Instruction:
1 Assembly Preparation
● RD60XX digital power supply*1, S800 case*1, 800W switch power supply*1
● Tools, accessory (DC power supply, 3 pin plug cable, multimeter, screw driver, test pencil...)
● Proper assembly environment
2 Assembly step
Note: The case material is a bit soft and may be slightly deformed during transportation. If there is a gap during the assembly, please straighten it before assemble it.
① Check the accessories: check if the accessories of S800 case are same as accessories list or accessory picture.
② Check RD60XX: Adjust input power supply to 12v/1A to power on RD6012, and set 5V/1A output on RD60XX, turn on the output to see if the output is normal.
③ Back board assembly: install the rocker switch and AC power socket on the lower board.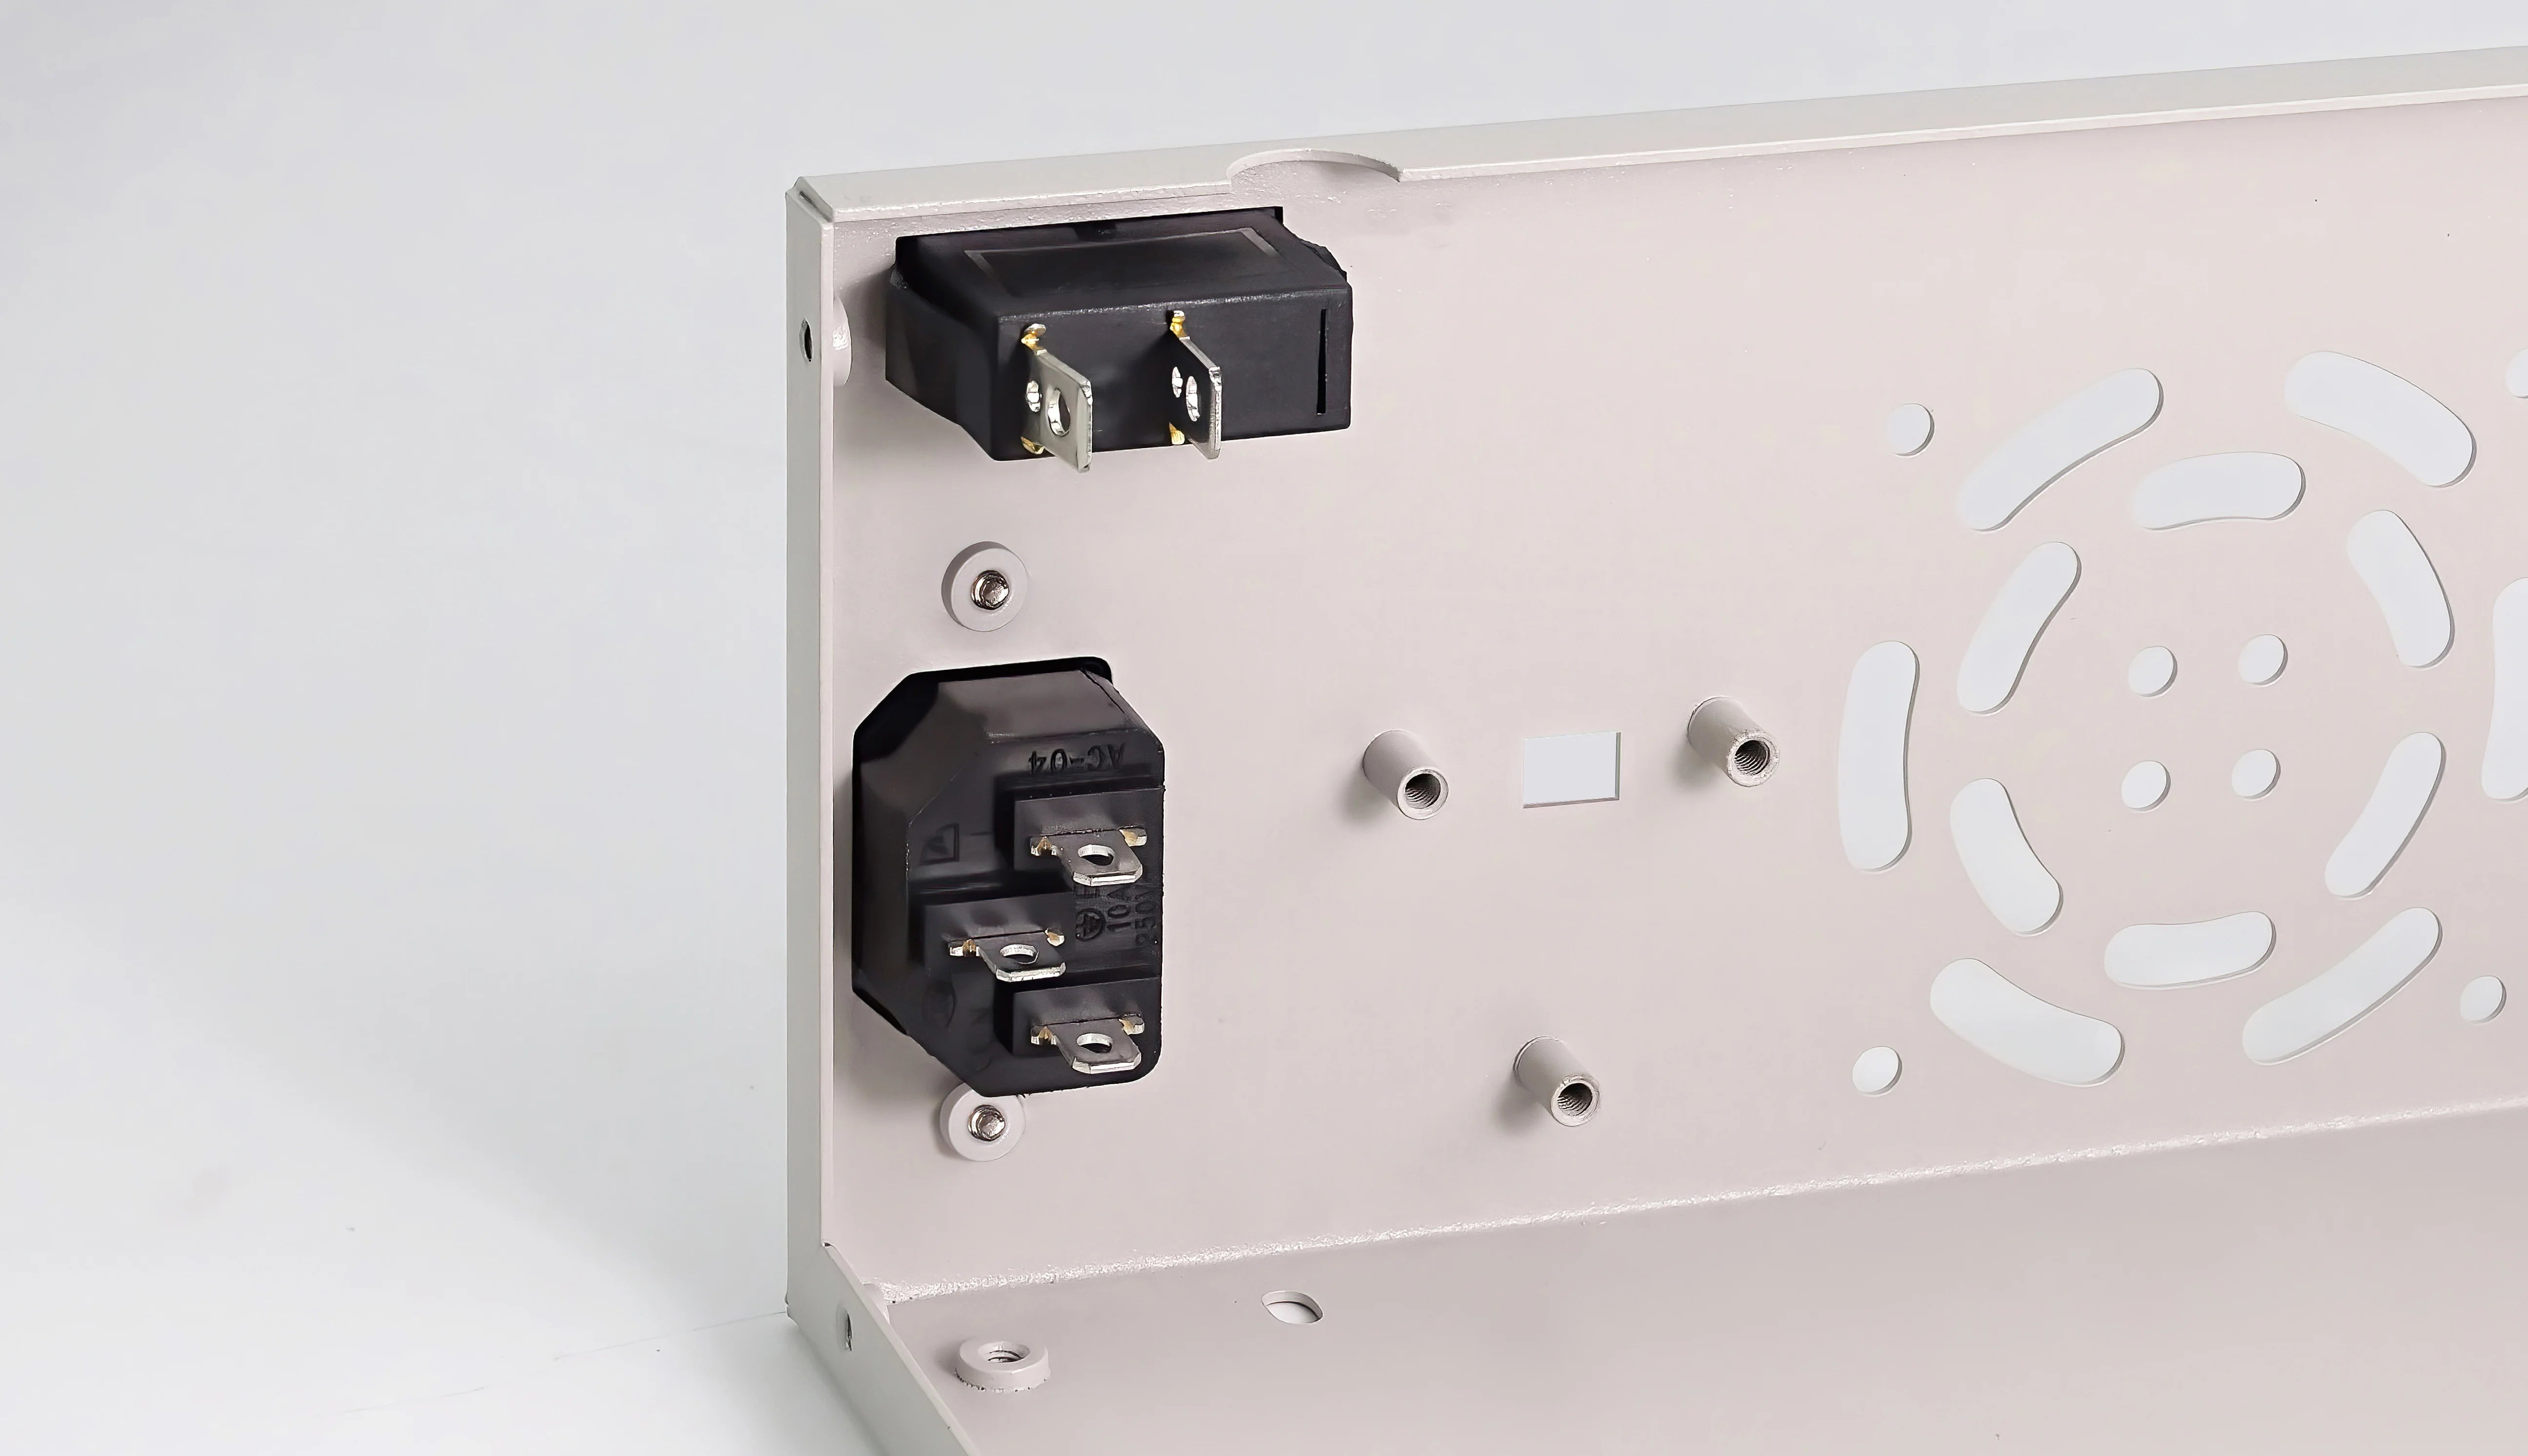
④ Connect cables to switch power supply: (dangerous, non-professionals should not operate)
Use long brown cable to connect the rocker switch and the live wire (L) of the switch power supply; then use short brown cable to connect the rocker switch and the live wire (L) of the AC power socket; Use the blue cable to connect the neutral wire (N) of AC power socket and the neutral wire (N) of switch power supply; Use a yellow-green two-color cable to connect the ground wire (E) of AC power socket and the ground wire (〨) of switch power supply. Use two red cables to connect the IN+ of the green terminal and the positive electrodes (+V), and use two black cables to connect the (IN-) of the terminals and negative electrodes (COM). Install the temperature sensor extension board to the back panel.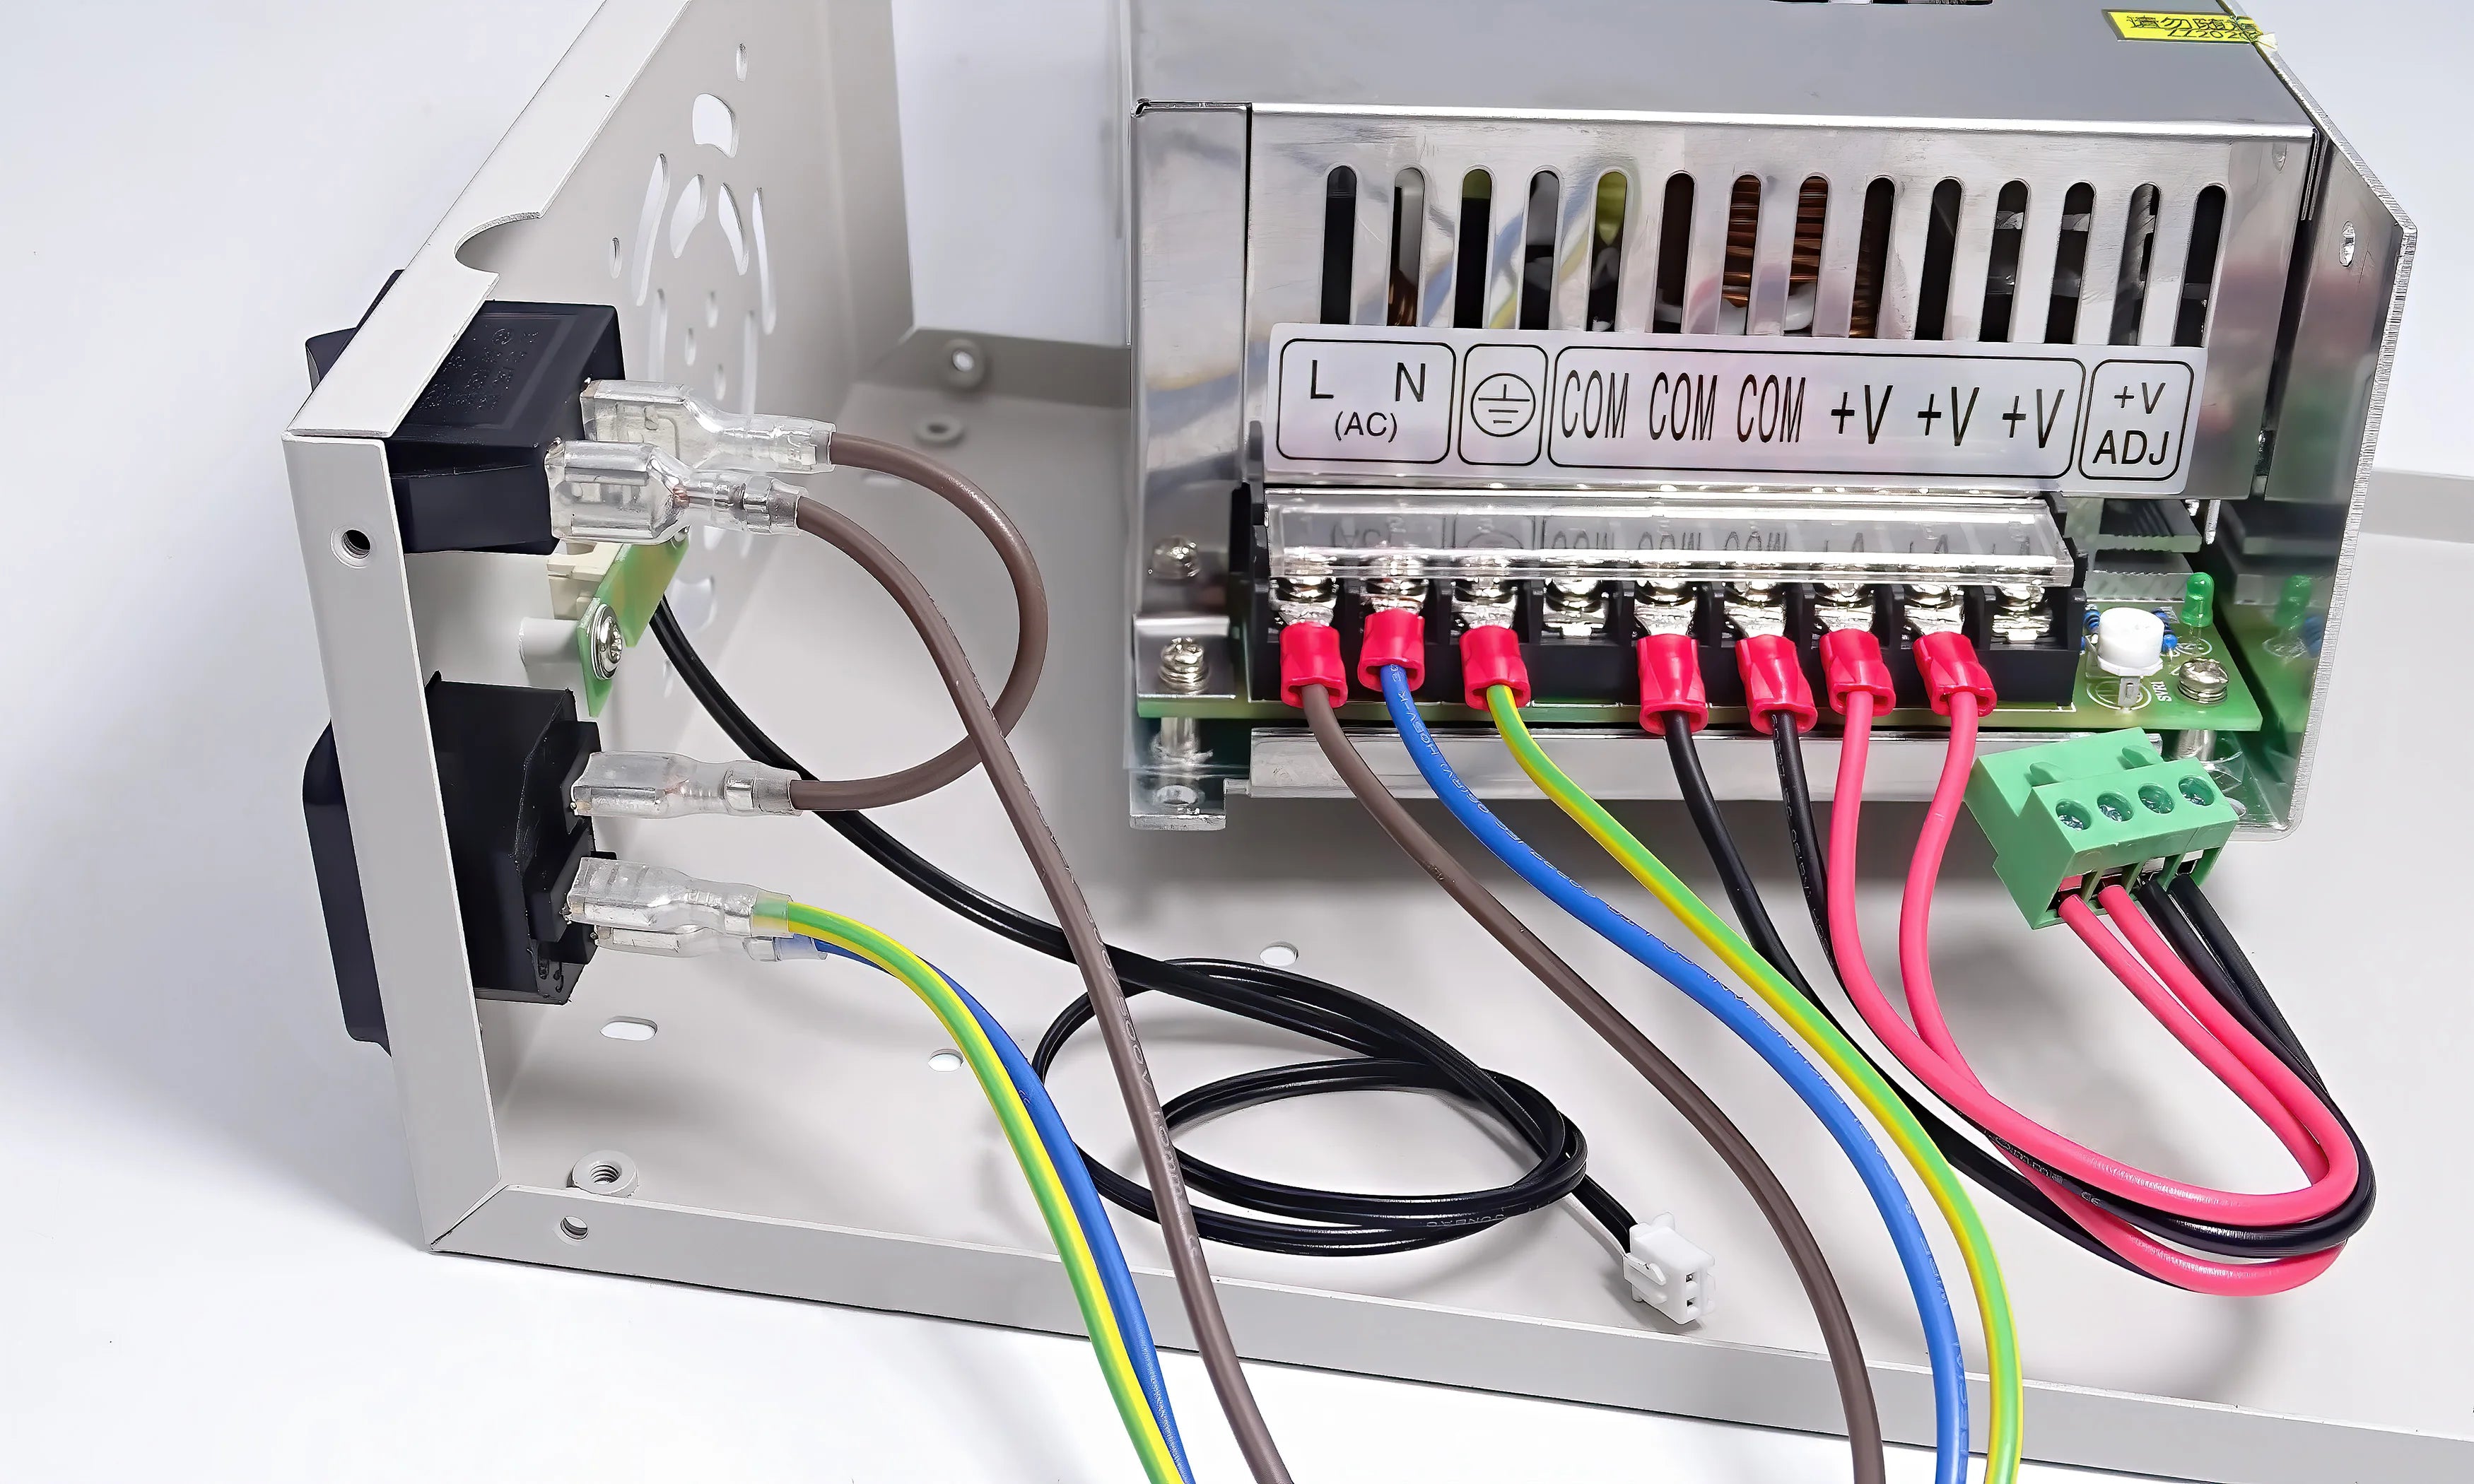

If you want to use S800 for RD6024, you need to solder the connector to the cables first, then you connect the RD6024.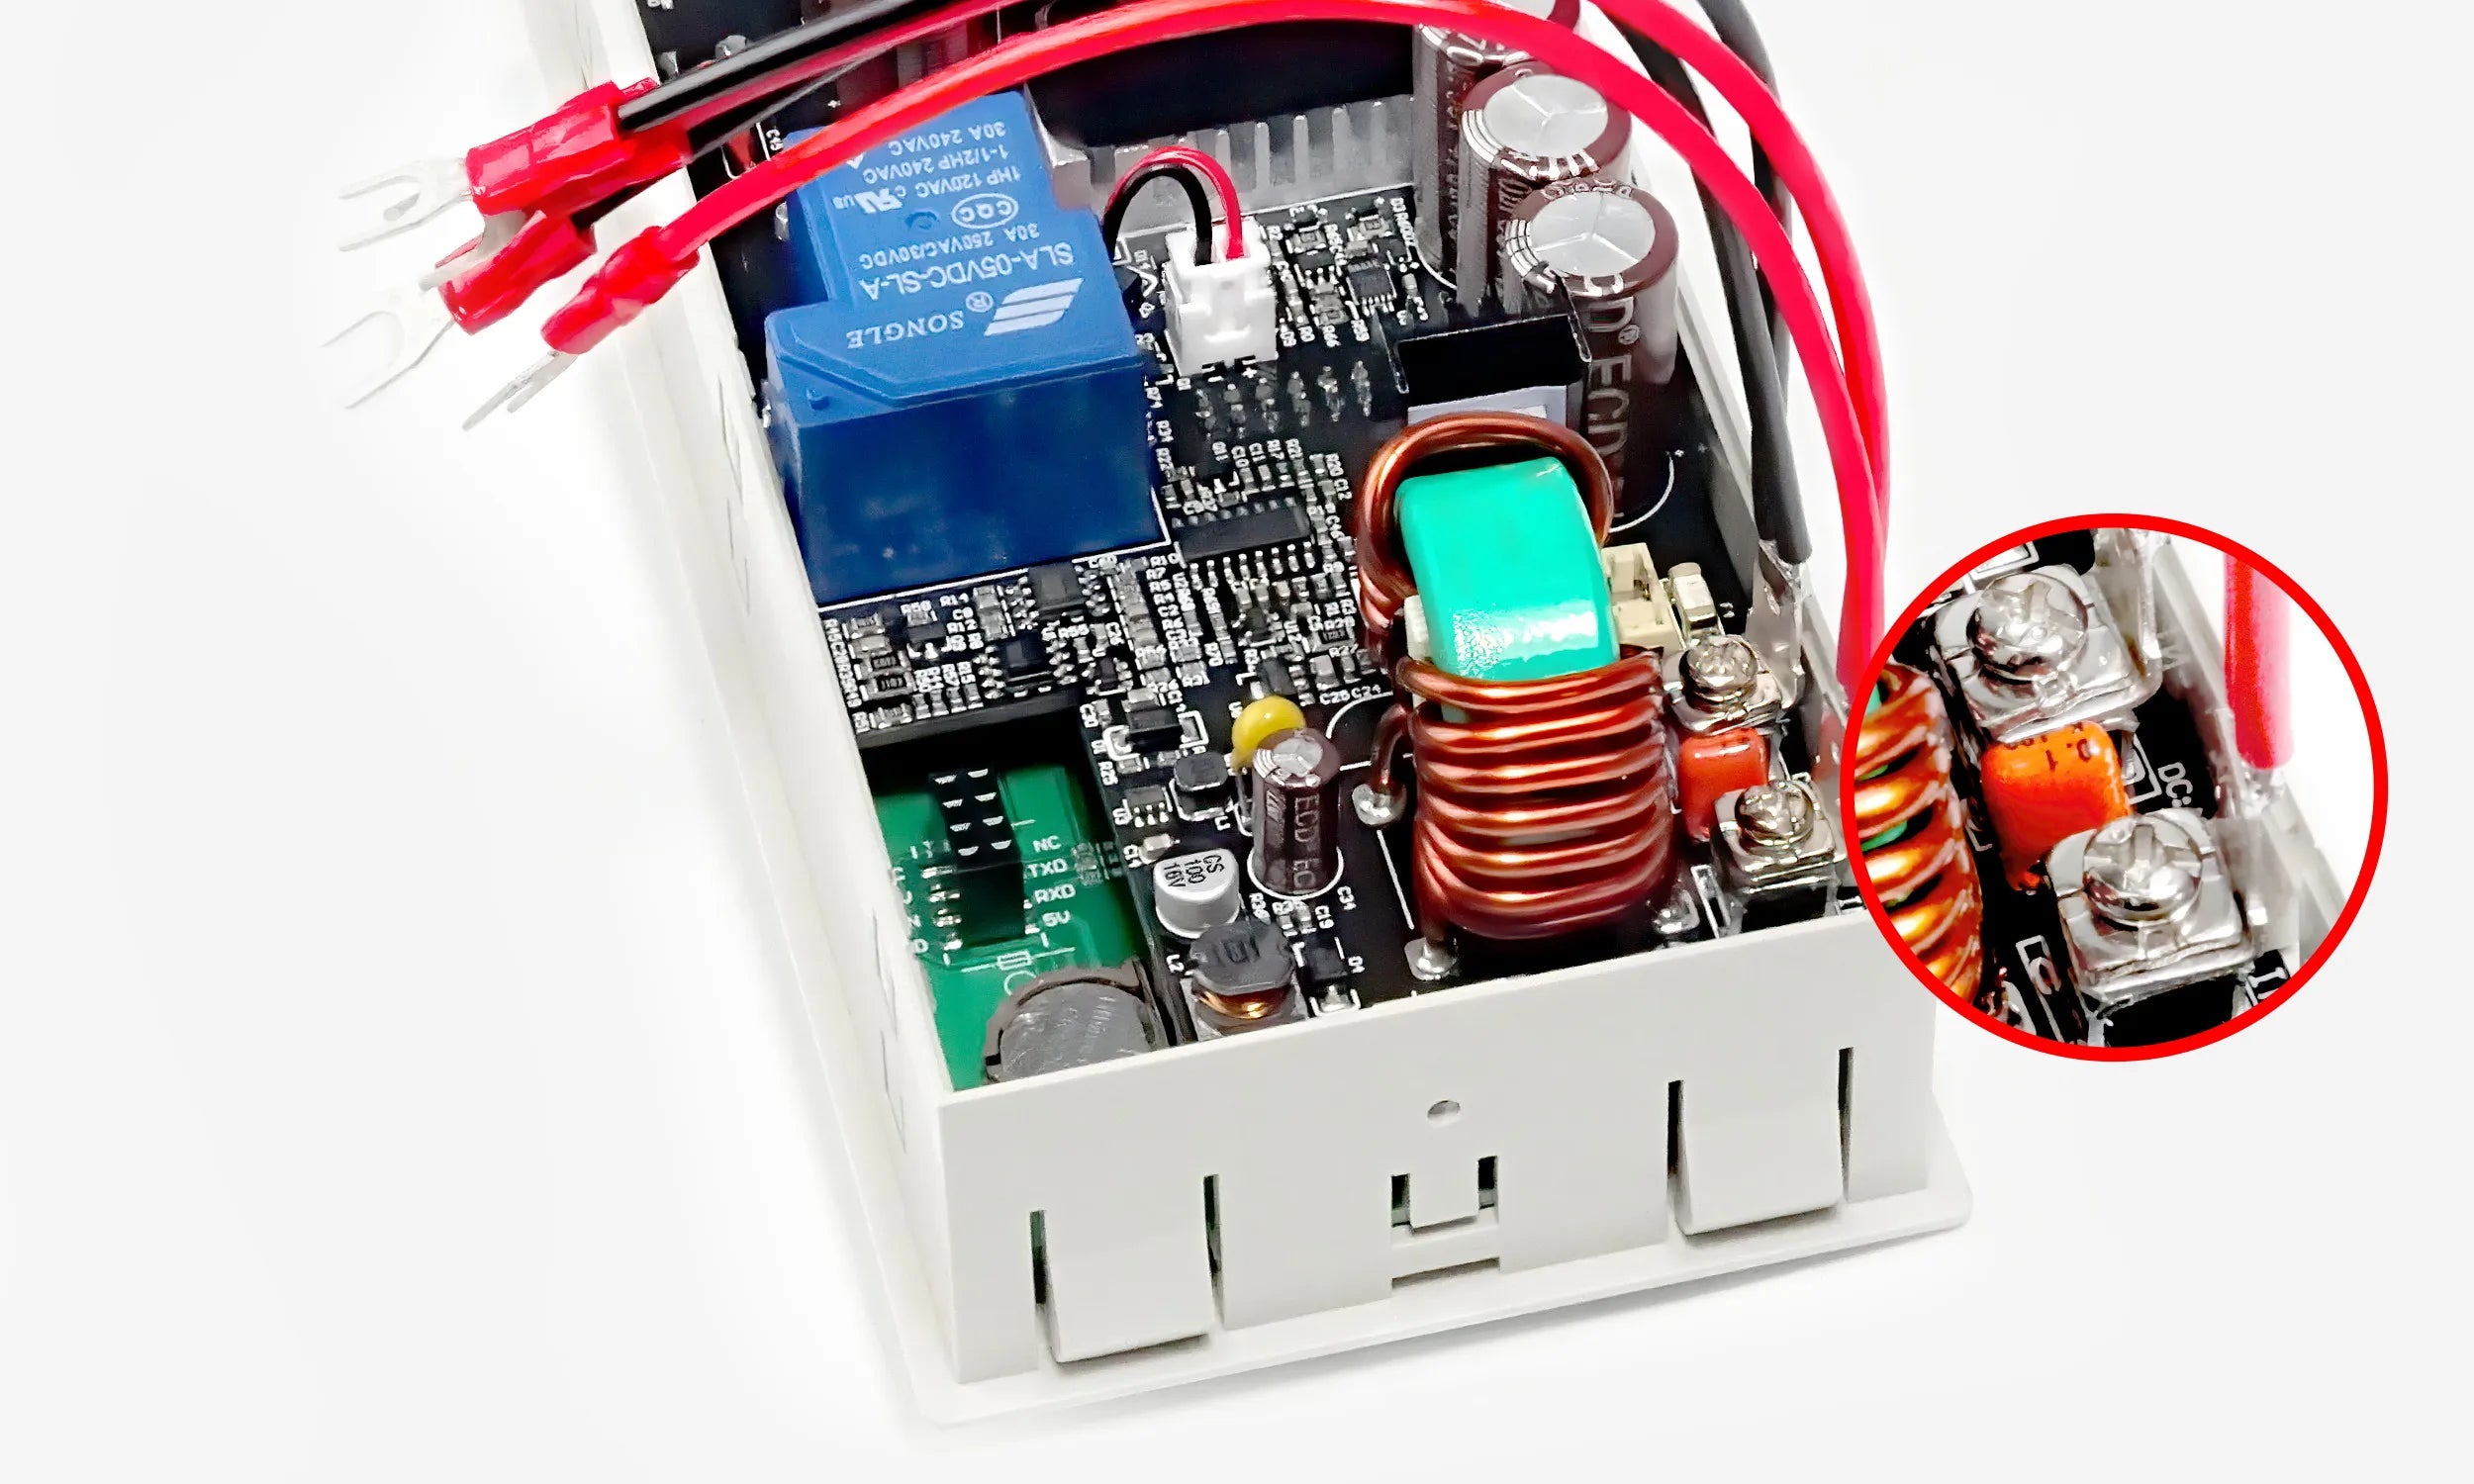
⑤ Assemble the switch power supply: install the switch power supply on the lower board
⑥ Switch power supply test:
Check the wring again and power on the switch power supply, and use test pencil to check the power and insulation status. Then use multimeter to check if the output is normal, then use screw driver to adjust the output of the switch power supply to about 68V.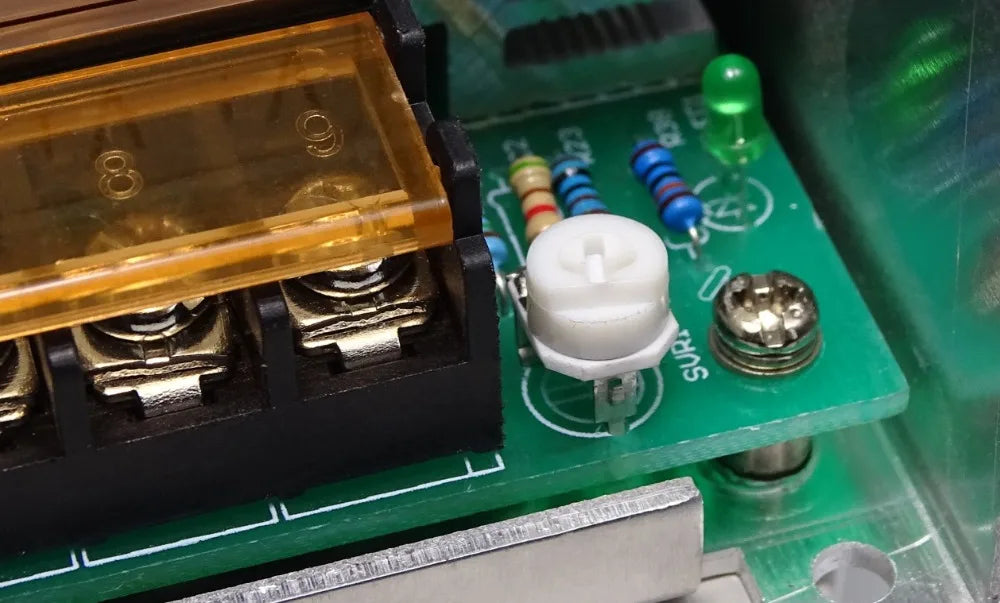
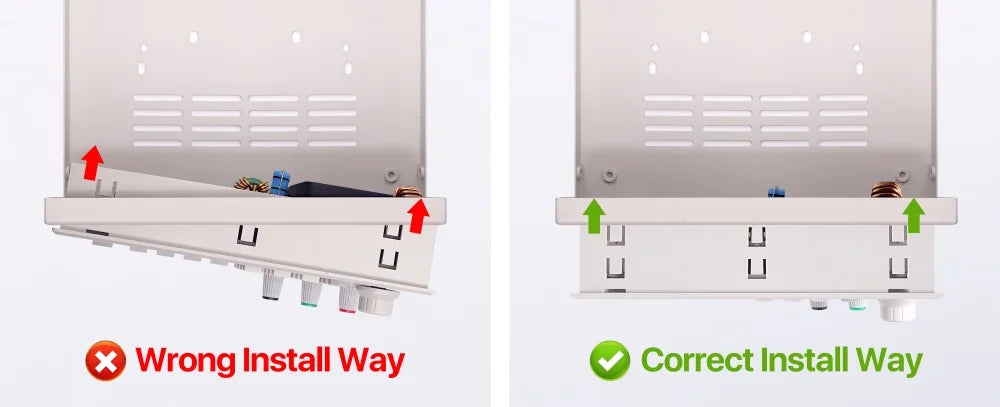
⑦ RD60XX assembly: If you have CR1220 battery, please install the battery with the positive side facing up, if you have WiFi module, please install it like what shows in the picture. InstallRD60XX to the front side in the correct way, otherwise it cannot be installed properly, we make flame tight to prevent the RD60XX from shaking, if the case is slightly deformed, you can gently bend the case to make it straight.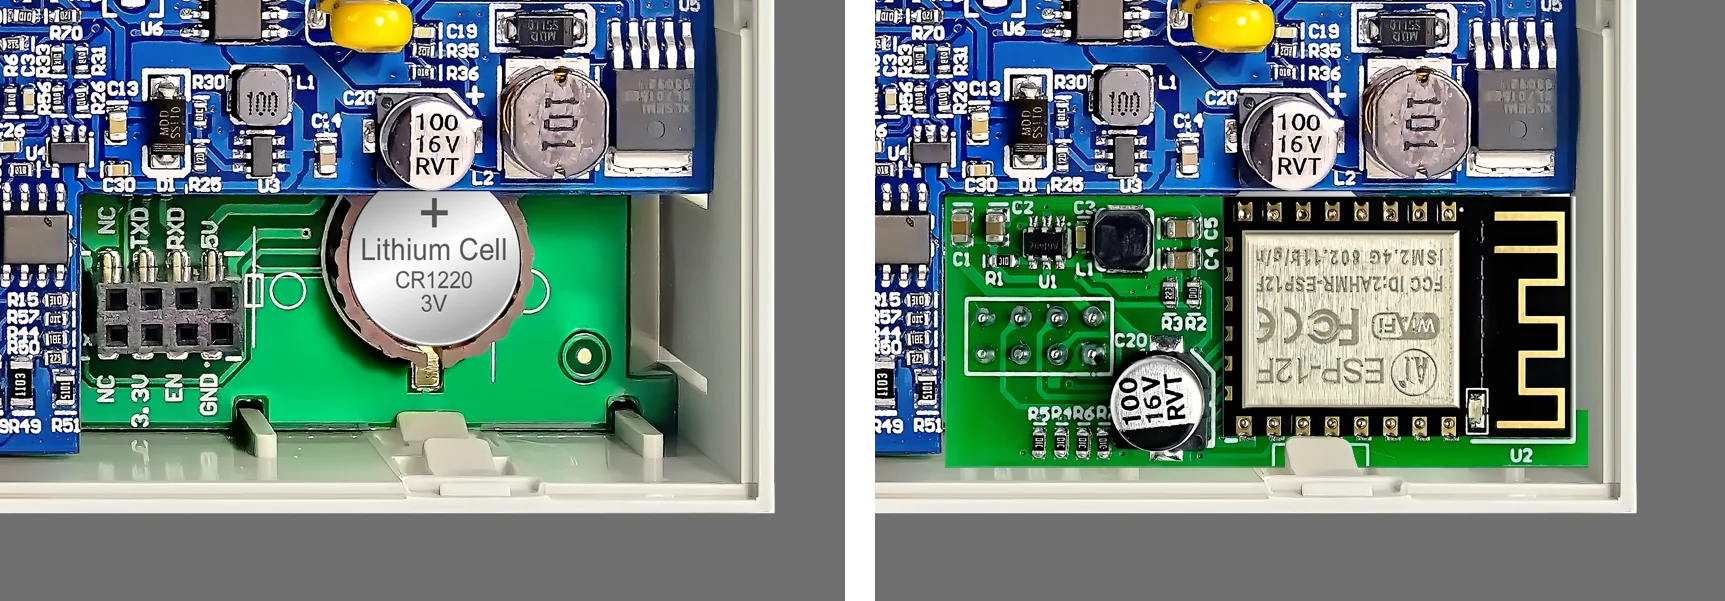
⑧ Connect the rest cables: insert the external temperature sensor cable, insert the green terminal and sort out the cables.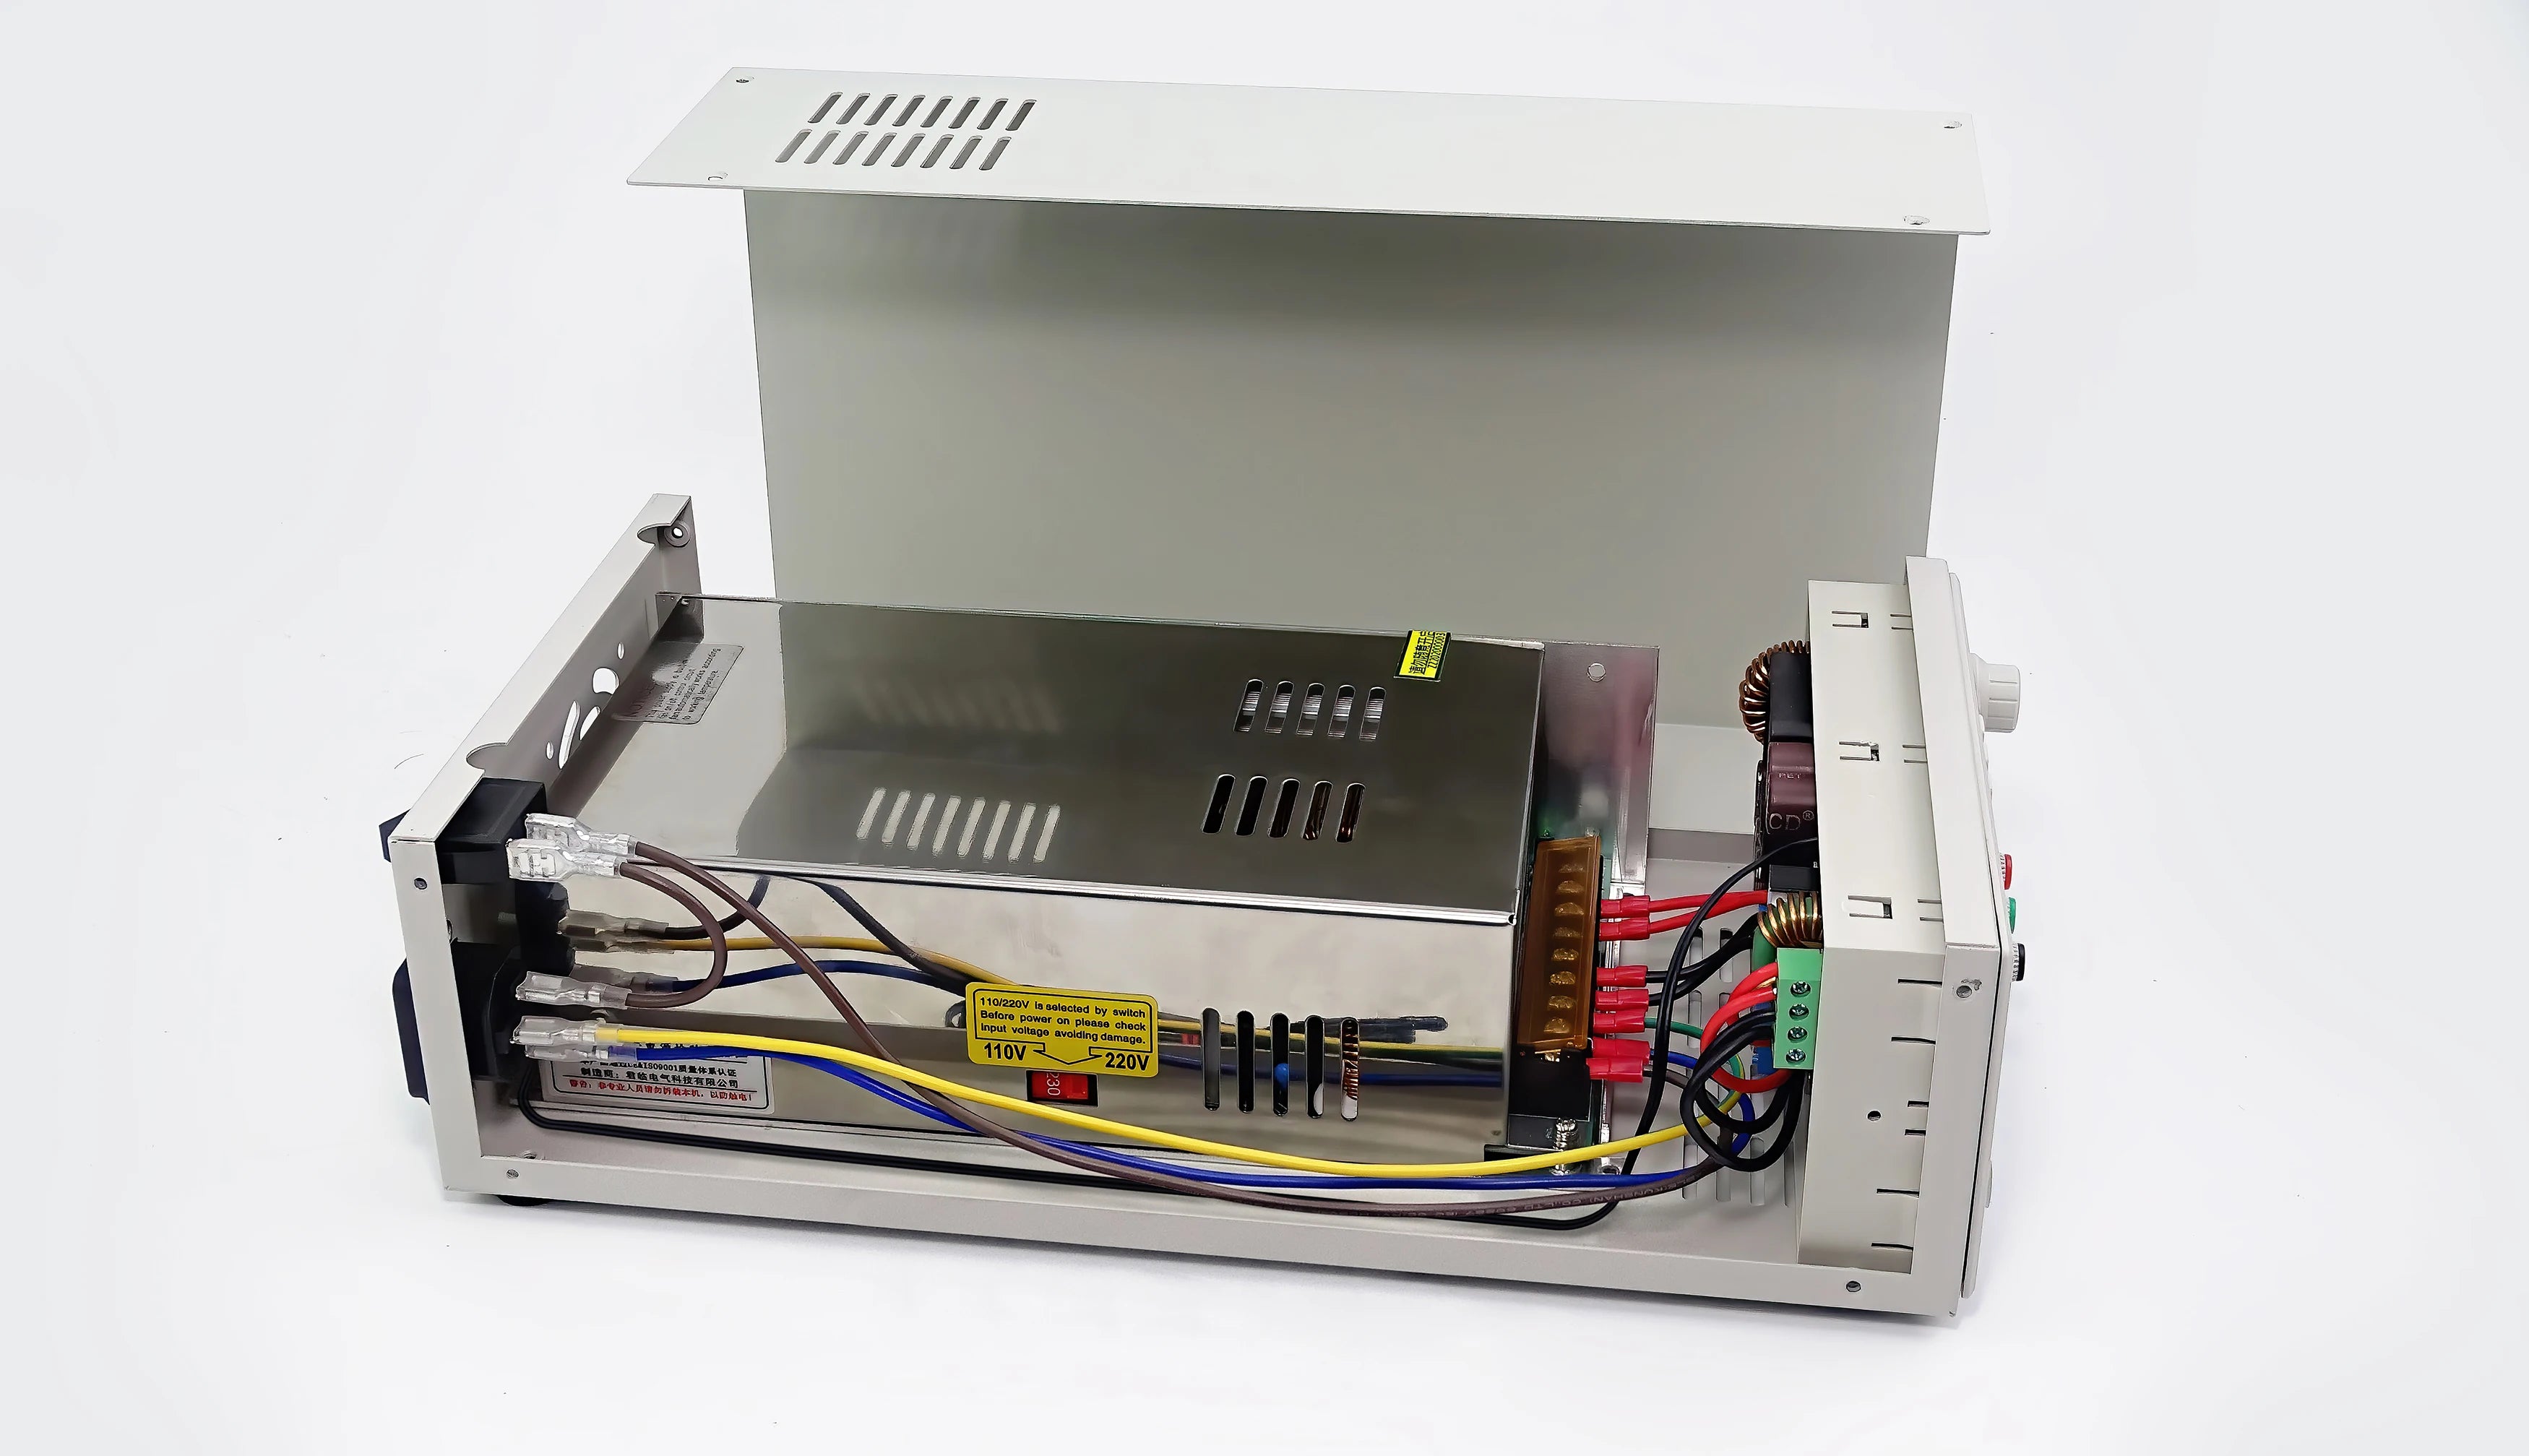
⑨ Install the screws of the case
⑩ Install the foot pads.
⑪ If you need to use external temperature detect, you can insert the external temperature sensor cable to be back end of the case, and do final test.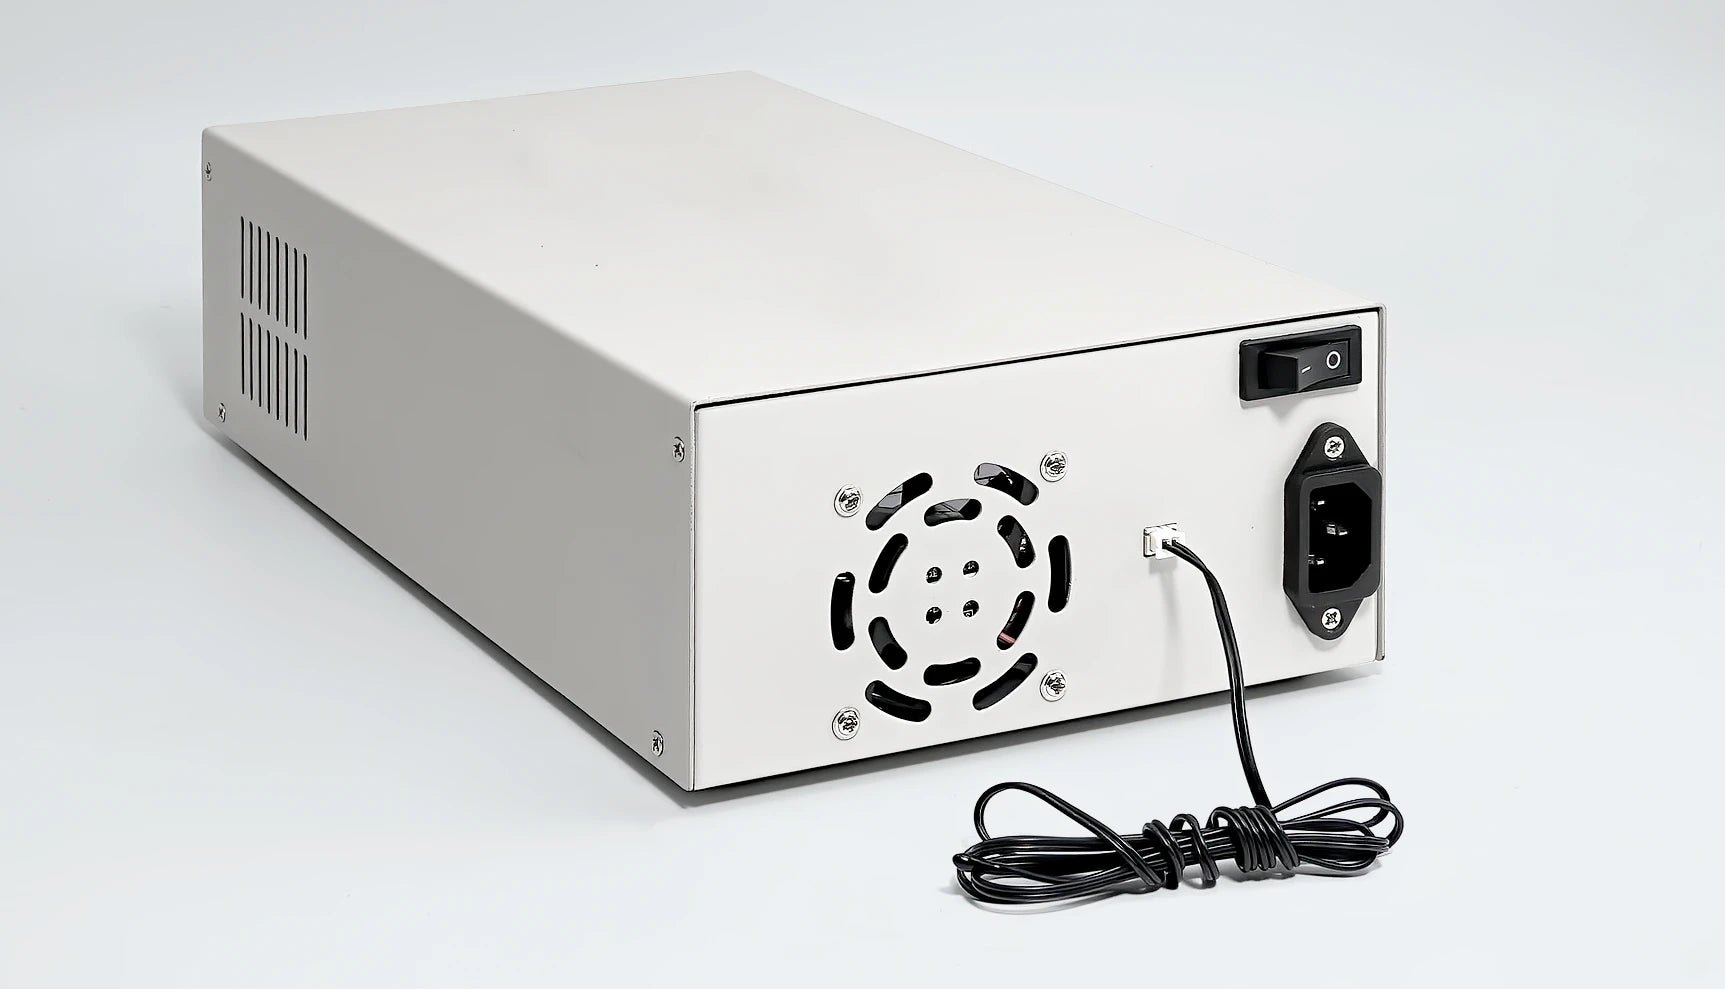
| Tipo: | |
|---|---|
| Fornecedor: | |
| Model NO.: |
S800 All-iron Housing Case, S800 Case (Top Cover Aluminum), 65V/800w 800W PSU RD6012/RD6012P/RD6018 |
| Ship From: |
CN |
| SKU: |
SKU0548S |